


 Braces guide
 Comparisons
 Guest posts
 Straight Teeth TV
 Aligners at home
How To Nail Your E-Consultation Photos
At Straight Teeth Direct™ we are reinventing orthodontics to make straighter teeth more accessible starting with an initial free e-consultation. You can now have your teeth professionally straightened using removable, invisible aligners, which are significantly cheaper than traditional braces.
Not everyone is eligible for direct to consumer aligners however, your teeth need to have enough space to move and adjust. This can be evaluated through initial images and later impressions of your teeth. To make sure you are a suitable candidate for clear aligners, we have developed a free e-consultation, your professional online smile assessment, where you can submit photos and answer some simple questions that will be reviewed by an online dentist. Here’s how to get started.
Taking your e-Consultation Photos
First, brush your teeth to offer the best view in the photographs. If you find it difficult to get a clear image yourself, ask a friend to take the photos for you. It’s important that the photos you submit are clear and not blurred, otherwise we might ask you to take them again. A focused image in the following specific angles is essential to assess the space between your teeth, the arch shape, and to determine if you are a potential candidate for aligners online.
In the video below, you’ll see how to take good shots showing the perfect view of your teeth using your smartphone.
Photo 1: Front on
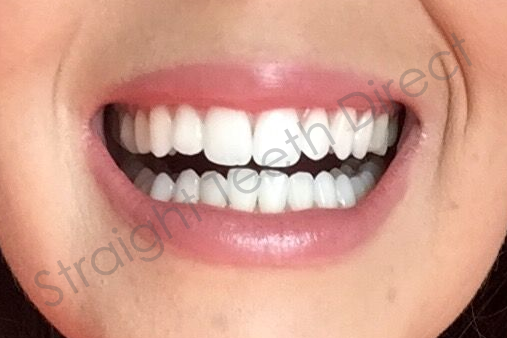
This needs to be a clear view of your smile from the front, as if someone is looking at you straight on while you’re smiling. In this example, you can see how the image is in the centre, clear and in focus. We can see the full surface of the upper and lower teeth clearly.
Photo 2: Right side
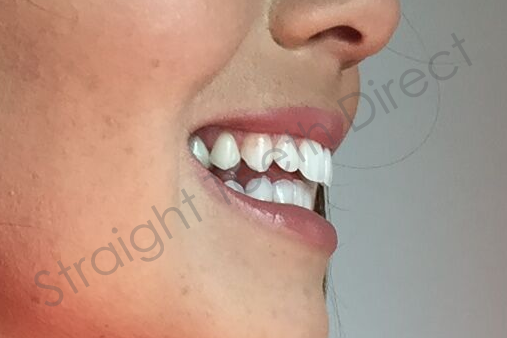
The second photo needs to show your smile from the right side. In this example picture you will see the right side of the teeth, both the upper and lower rows.
Photo 3: Left side

This photo needs to show a clear view of your smile from the left side, showing the upper and lower teeth in focus.
Photo 4: Open up
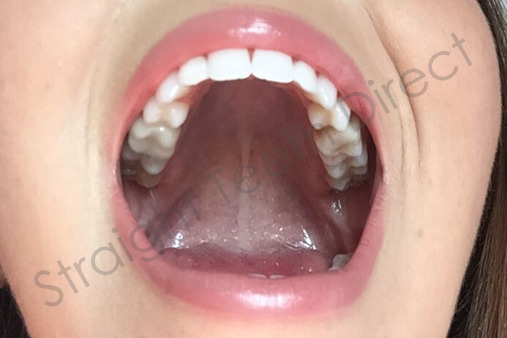
The fourth photo needs to show how the upper row of teeth sit next to each other, taken from below. Open your mouth wide and photograph from below, focusing on this top row of teeth, and how the upper arch is shaped. Make sure you get all of your upper row of teeth into the shot, including those at the very back of the mouth.
Photo 5: Open down
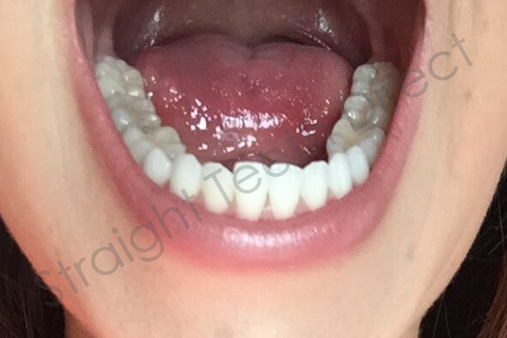
This is similar to photo 4, but taken from above. This allows us to see the lower row of teeth, how they sit next to each other, and how the lower arch is shaped. Make sure you get your teeth at the very back into shot!
[content_block id=1368]
Answering the questions
After you submit your photos, there are some questions to answer about your general oral health. You’ll just need to tick yes or no and tell us what you are looking to achieve with at home braces.
One of these six questions asks whether you have seen a dentist in the last six months or not. This is because you will be given the option to submit a copy of your recent OPG or small X-ray and BPE gum scores, which are easy to request from your usual dentist. If you haven’t seen a dentist in the last 6 months, this is an essential first step that you can look into before receiving your personalised treatment plan.
Do you have any more questions about your free e-consultation? Check the FAQ page or contact us today and we will guide you through it.
Still thinking about it?
Fill in your email to receiveyour free guide!